Have you ever felt like a cryptologist trying to break the code when you had to look back at what you scribbled down in class? Many students do this almost everyday – they try to write at the speed of the tutor’s speech, abbreviating as much as you can while trying to grasp the difficult concepts. Then, a day later, you open those notes and see that they are unreadable to say the least.
If you can remember yourself doing that, this guide is exactly what you need. It covers the five best techniques on how to organize your notes during the lecture so that you can make sense of them in the future.
1. Outlining

This method is perfect for those who prefer simplicity and minimalism, as it is one of the easiest ways to structure your writing. It can be used in a variety of situations, but it works best for lectures that follow a clear, logical pattern, covering one or two key points at a time. However, it’s not an apt technique for science classes like math or physics, which encompass a lot of formulas and charts.
How it works
Channel your active listening skills to identify the main concepts or ideas that will be covered in the course of a lecture. Sometimes, professors mention that in the beginning of a lecture or a few classes beforehand. Write down the main headings at the left side of the page. Leave enough space beneath to add sub-points, additional facts, in-depth details, and examples to each section.
Try to think a bit ahead of time, how much space you’ll need. It’s best to leave some more space than to have to stuff things together. Then, you can use indenting, bullet points, and numbering to establish the relationship between different parts of the text and to highlight their place in the topic hierarchy.
2. Cornell Notes

This note-taking technique was developed by Cornell University professor Walter Pauk back in the 1950s. Ever since it was first introduced, this method has gained wide popularity among college students as one of the best approaches for condensing and organizing notes. It also serves as a powerful aid for recalling, reflecting, and reviewing the information presented in class.
How it works
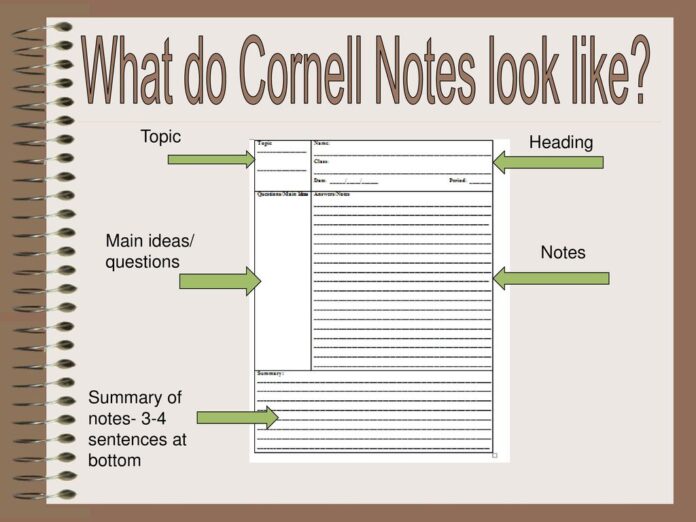
Divide the page into three sections – one at the bottom along with two columns in the center.
- Reserve the area on the right for the notes you take during the lecture. You are free to arrange them any way you like, be it a linear, visual, or pattern format. You can fill up this section with text boxes, graphs, diagrams, schemes, or even doodles.
- The left margin is the cues section. Here you can write your comments, questions, references, or hints that will help you memorize larger ideas. It’s better to add the cues right after the class while the information is still fresh in your head.
- In the segment at the bottom, give a rundown of everything you’ve got on your sheet. The summary will help you find relevant info when revising for a test or assembling materials for a written assignment.
3. Mapping

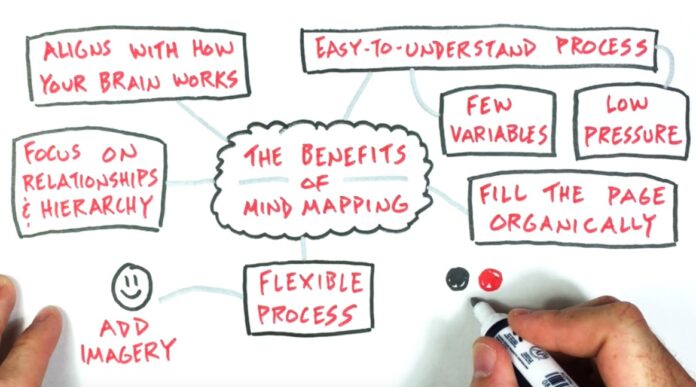
Concept mapping is a graphic representation of the educational content that clearly shows the relationships between various subject areas. Though it may not be the most popular technique, using visual aids is a great practice to enhance understanding of the studied material. Applying the mapping method makes even more sense if we take into account that nearly 65% of the world population are visual learners. So for learning progress, a picture is indeed worth a thousand words.
Mind maps or spidergrams are perfect for subjects that deal with complex, abstract ideas or those comprising numerous interrelated topics. Thus, this note-taking method will be especially beneficial for those enrolled in history, philosophy, psychology, or sociology classes. According to WritePaper.com, creating mind maps is a beneficial tool that can help you write your papers. These maps help you organize your thoughts and many people use them when they write. A large number of professional writers use them to create what their clients want, and what you get at the end is a well-organized paper.
How it works
Start with writing the central topic in the middle of the page. Then draw nodes of all the main concepts related to it, one branch per point. You will likely need the whole side of an A4 paper, as there should be enough space to write additional details underneath each subtopic. You can add smaller branches for dates, formulas, supporting facts, and related notions. Use joining spokes, color coding, or special marks to show the connections between different points. Continue this pattern as your professor unveils new concepts and examples.
4. Sentence Method

This method is good for making quick and simple notes. It is the best approach for those occasions when the lecture content is intense, and it comes really fast. This technique helps to determine which information is important and which is not and how different fragmented details fit together.
How it works
Condense every noteworthy piece of information into a point or sentence form. Start a separate line for every new thought, fact, or topic. You can edit, organize, and group the ideas you’ve jotted down later on. During the lecture, your main goal is to get all the key concepts covered.
5. Writing on Slides

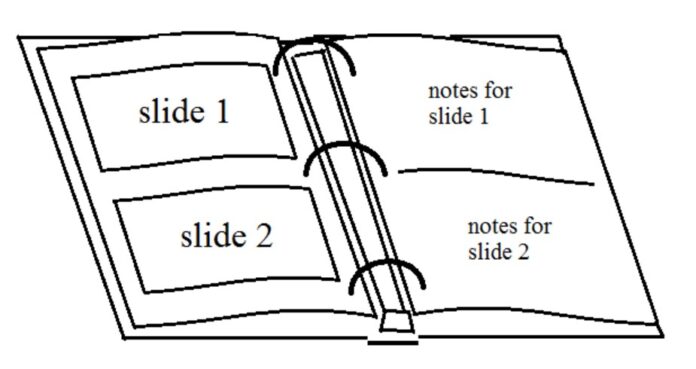
There is no easier way to track the lecture than to use paper printouts provided by the instructor. The slides are a step-by-step walkthrough of the class content, which guides students and helps them identify the essential topics and concepts. However, the scope of information presented on them is usually quite limited compared to oral explanations given by the lecturer.
How it works
Download the lecture files and print them out before class. At the lecture, try to make connections between different points and transcribe your understanding of these relationships into your notes. Keep an ear out for references to other sources and pay attention to introductory remarks, repetitions, non-verbal cues as they usually indicate that something important is being said.


